Combine and Conquer with Teams in Dynamics 365
Dynamics 365 Teams are a great way to manage records and tasks because teams can own records and have a definitive security role associated outside the scope of a Users default role. This provides enhanced visibility to managers regarding which group is responsible for which objective; extends a Users reach enabling them to access and work with records they otherwise would not have privileges for; and allows for a simplified security structure, particularly when managing a large group of users.
A few examples of situations wherein teams are best utilized include:
- When Users span multiple business units but share a logical association
- Security Roles within a Business Unit are primarily restricted to User Access Only
- In Customer Support where work is routed to a Support Queue and the management of the Cases is best done through team ownership
To setup a new team in D365, go to the Settings tab in the navigation menu and select Security.
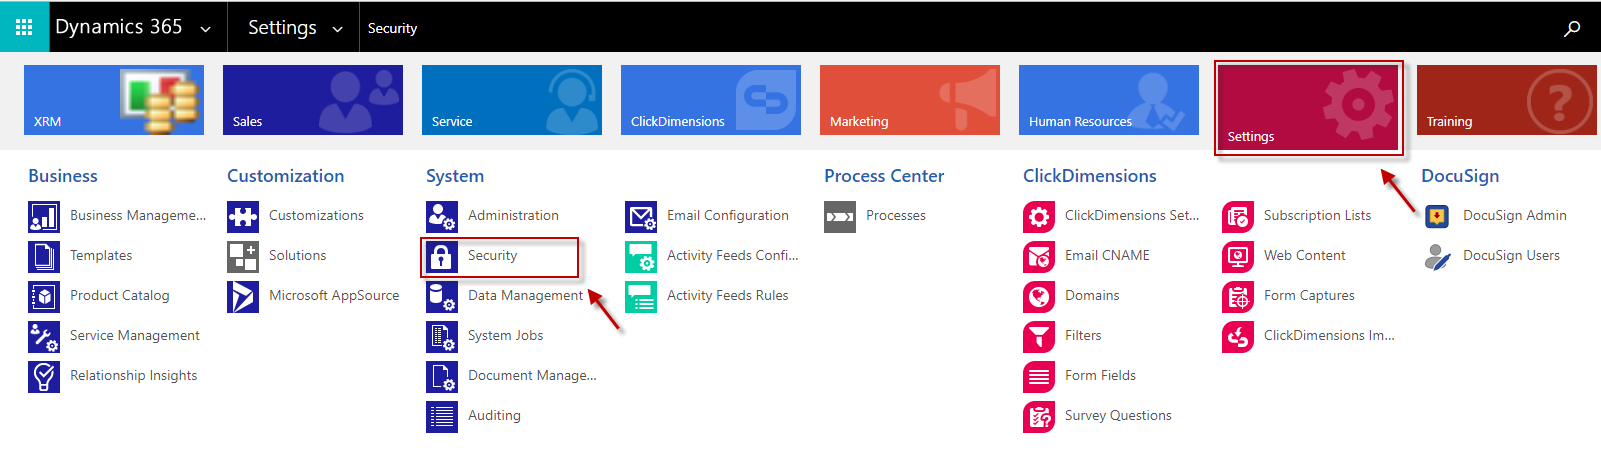
In the Security section click on Teams.
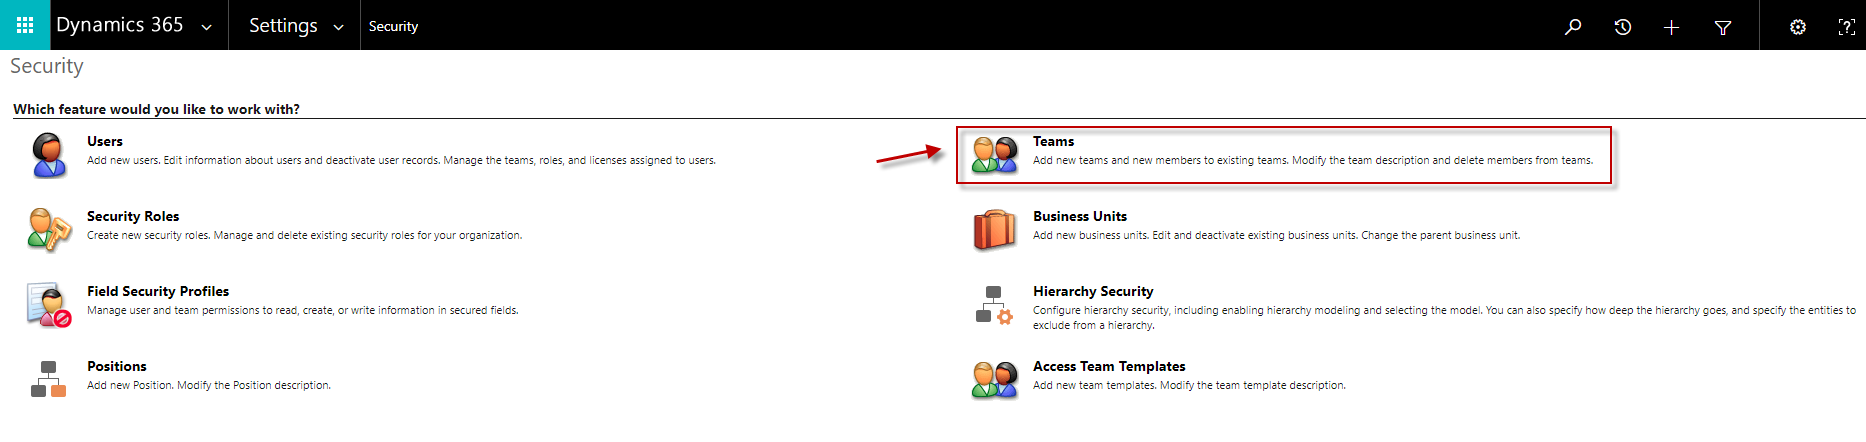
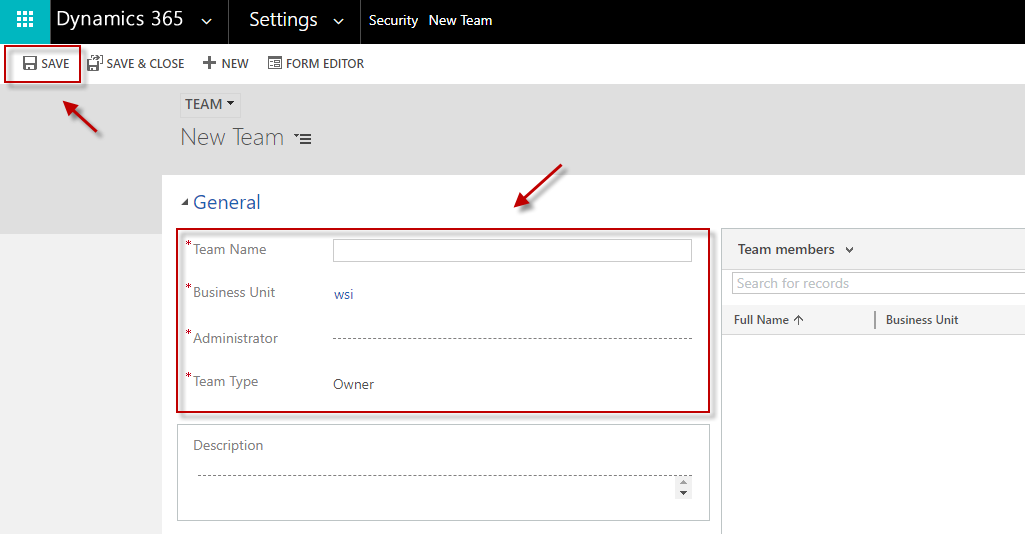
In the team view window, click the New button on the command bar. This will open a new team form.

In the new team form, simply fill out the required information and click save. A team can take on one of two types, Owner and Access. An Owner Team can own records and the Team must have an associated security role or roles. An Access Team is not assigned a security role and the team does not “own” any records, records are shared with members of the access team. (The example follows the path of creating an Owner Team.)
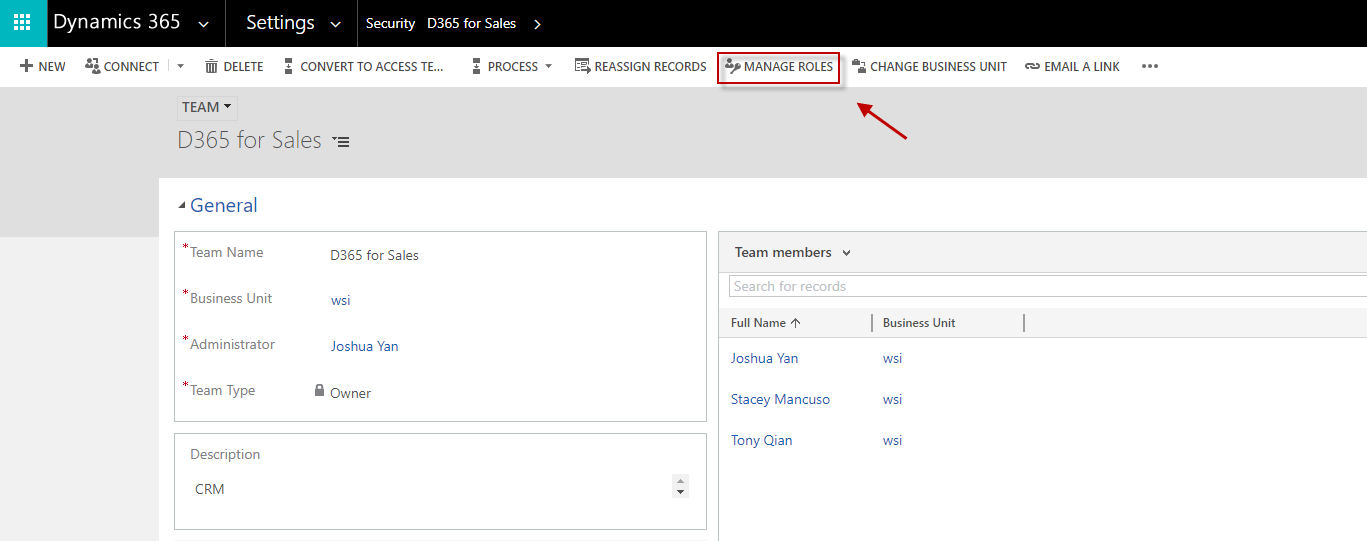
Once the record is saved, you can begin adding members to the team by going to the Team Members (Users) subgrid. Click on the plus sign and then the search icon. This will provide a user drop down list, simply click on the user you wish to add.
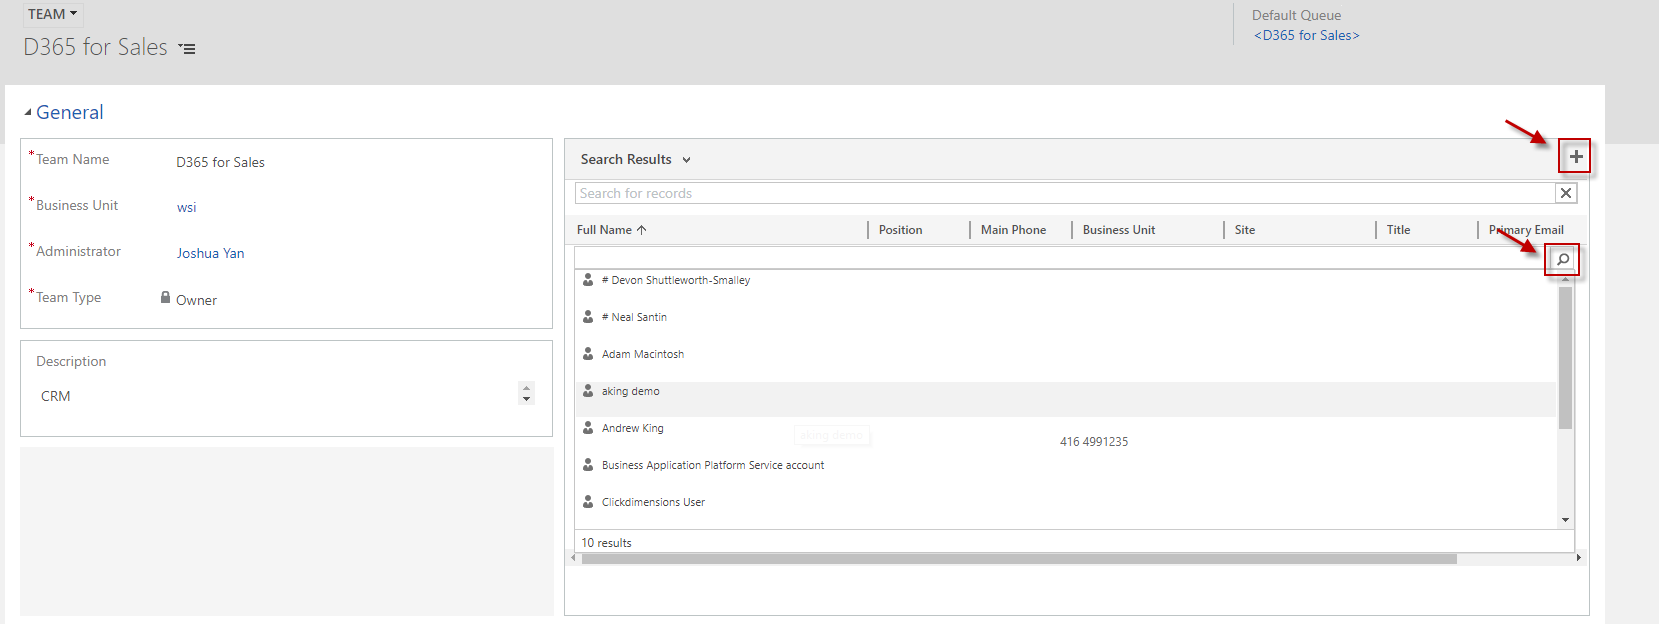
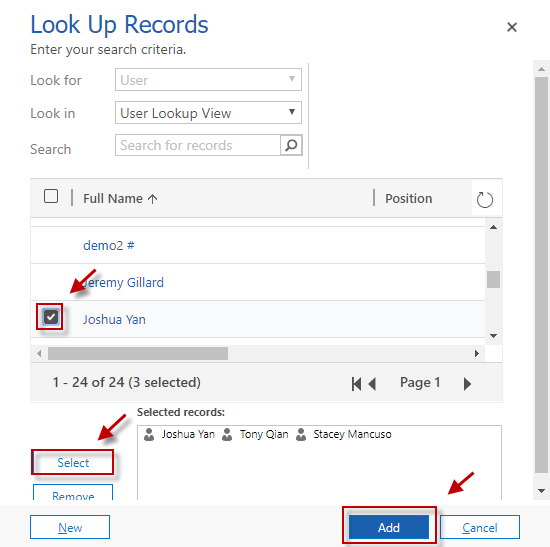
If the user you are looking for is not in the list, click on the Lookup more records option at the end of the list. This will open a lookup window, here you can view all users in the system. To add a user from this window, click on the check box next to the user name and hit select. Once all the desired users are selected, Click Add to add all of them to the team.
Now that the users are added, you will need to assign the team a security role which will be passed down to all members of the team. To do so, select Manage Roles in the command bar.
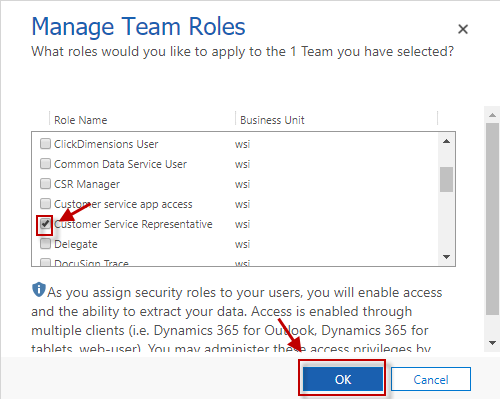
Next select the role(s) you wish to assign and select OK once you are finished.
That’s it, you are done! Now that you have created your team, you can now assign records to your team and create records and assign them to the team. If you need a hand setting up Teams in your Dynamics 365 environment, contact our specialists at