Find what you need, and only what you need with Dynamics 365 Views
The records you store in Dynamics 365 typically share some association with other records of the same type. Whether it be leads owned by a specific user, accounts of the same relationship type, contacts located in a specific city, opportunities created in last “X” days. The list is endless and limitless. With a little planning, you can create Views which automatically filter records for you based on the criteria you set.
So, what are Views in D365?
Views display all the records of a specific entity type in your D365 environment. Out-of-the-box you are provided with a variety views, but you can add to these, creating custom views which are significant to you. Clicking the drop-down arrow next to a view name reveals all the views you have at your disposal.

There are two types of Views which can be created, system views and personal views. System Views are created by a System Administrator or System Customizer, and are available to everyone in the organization. Personal Views are those that a User can create for themselves, and are only viewable by that User (or Users they “share” the view with), and what this blog will focus on.
Creating a Personal View
The creation of a personal view affords you the ability to configure the following attributes:
- The filters which need to be applied, thereby restricting the records that appear
- The columns you want displayed and their width
- The sort order of the listed records
You can create personal views by saving a query that you define by using Advanced Find or by using the Save Filters as New Views and Save Filters to Current View options in the list of views. These options and saved Personal Views are included at the bottom of system views in the application.
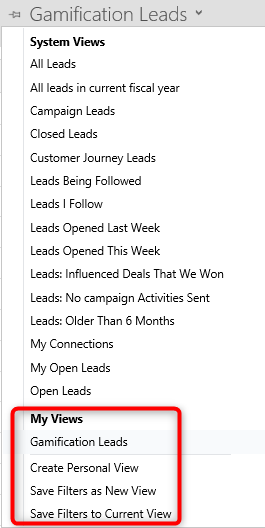
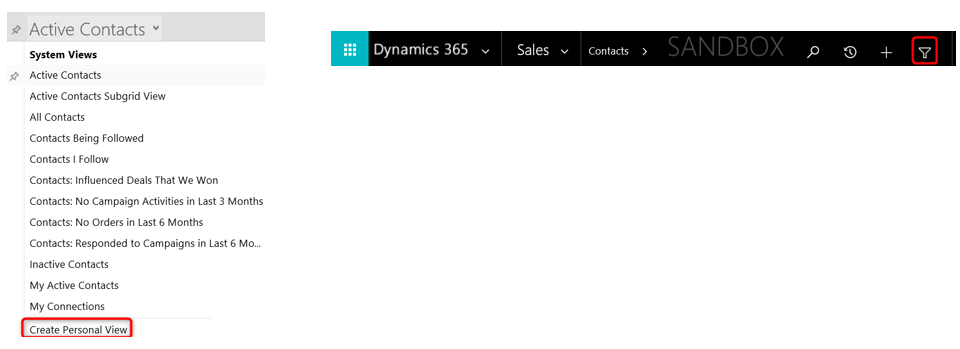
To create a personal view, either choose Create Personal View at the bottom of the view list or select the Advanced Find icon in your navigation bar.
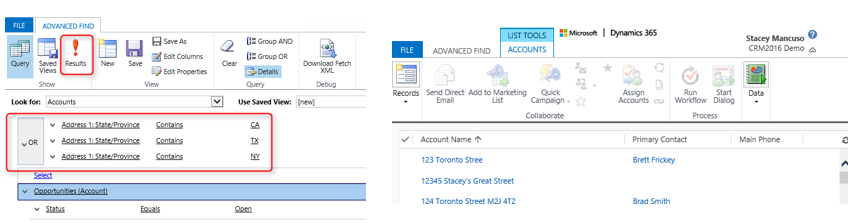
In either case the Advanced Find window will open, and you can begin a search on any record type. In the Look for dropdown, select the entity you want to perform the query on, and then you can either use an existing view and edit the conditions by performing a “Save As” or you can create a new view by selecting New.
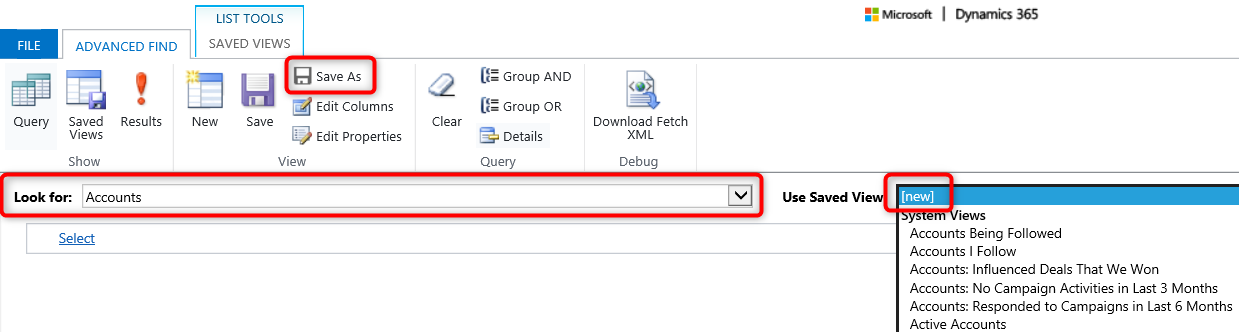
Filter: In the select area, choose the fields you want to perform the search on, the query operator (equals, contains, begins with...), and the data value. Repeat these steps for each condition of your query.
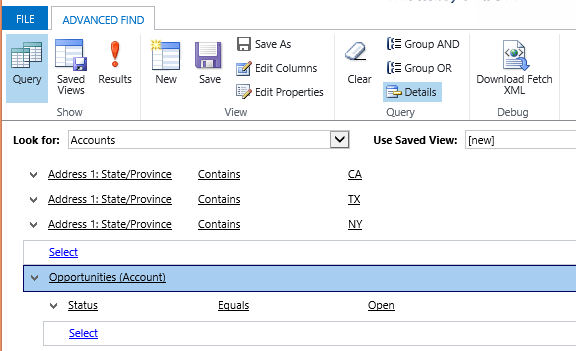
All conditions are processed as an AND statement. In the graphic above based on how the data has been entered, the results will only display an Account that is in all three states and has open opportunities. This query will return zero results because an account cannot be located in 3 different states. To display results of Accounts that are in CA, TX, or NY you will need to process as an OR statement. Select the arrow next to each of the field names that you want to include as an OR statement, and choose Select Row. Then in the navigation bar, select Group OR.

Select Results in the ribbon to view the results.
Customizing Columns: From the query screen, select Edit Columns in the ribbon.
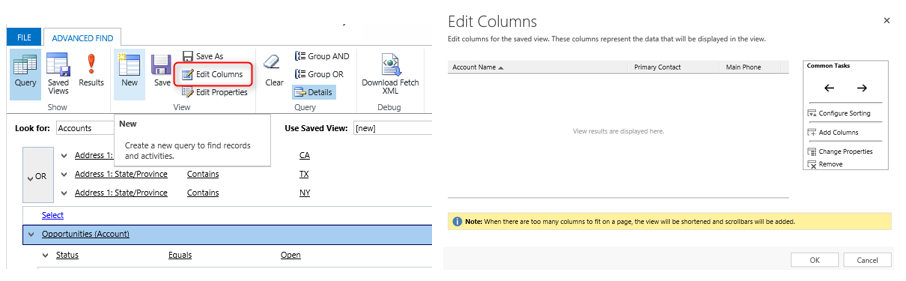
To add columns, select Add Columns, and make your selections. Then select OK.

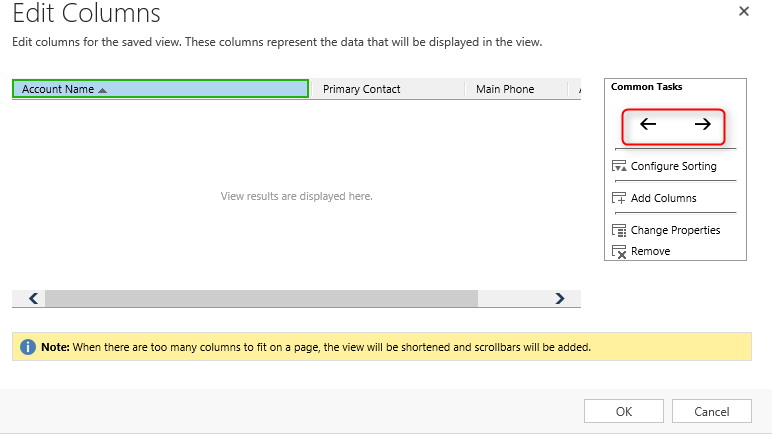
To move the columns from left to right, select a column and use the arrows to move the column to the desired position.
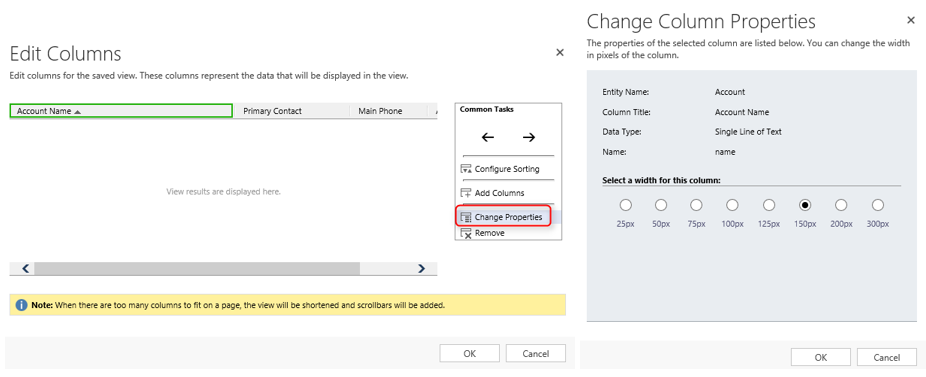
To adjust the width of a column, you can either double click the column or select the column and choose Change Properties.
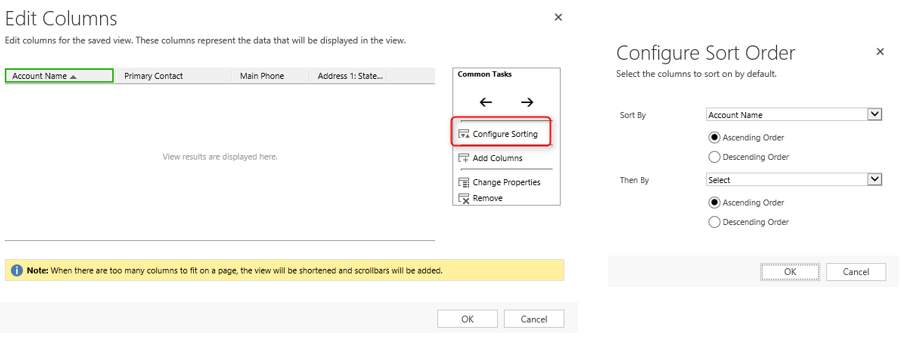
Configure Sorting: Select Configure Sorting to choose your sort column(s) and the sort direction, ascending or descending.
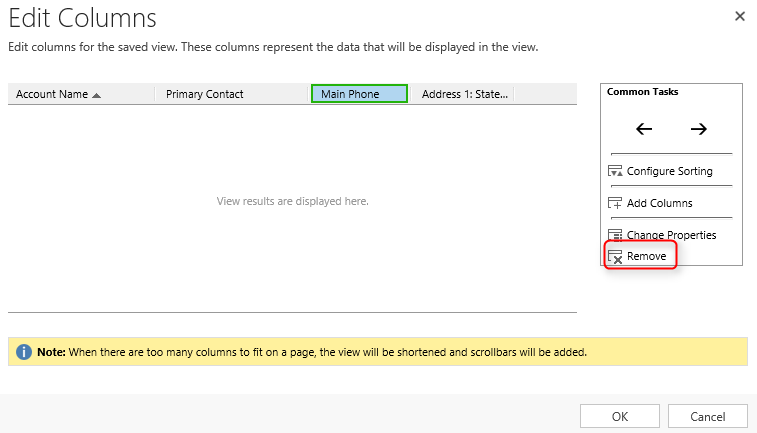
If you have added a column in error, or just decide you do not want the column in the view, select the column and choose Remove.
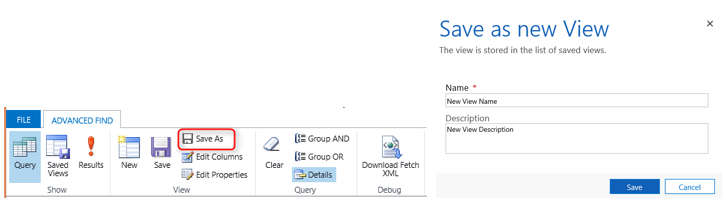
When you are done configuring the view, click OK. From the query screen, select Save or Save As in the ribbon and enter a Name/Description, then select Save.
After a quick refresh, when you navigate back to the entity you created the view for, you will find it at the bottom of the View list.
There you have it, you now know the steps to create your own personal views. So, have at it, and start creating views to your hearts delight. Should you need a hand, we are always available to assist, reach out to us at