Dynamics 365 Business Central OAuth2 Protocol
Many API integrations with Business Central SaaS are using the web service access key for basic authentication. But the 2022 release wave 1 (version 20) will remove this feature in favour of OAuth2. Since 2020 release wave 2 (version 17) a warning is displayed on the User card that the web service access key will be deprecated. Version 18.3 has been officially released and is available for the SaaS platform. So, you can test this new authentication method now. It will soon be the only authentication method available as access with Web Service key is deprecated. This is only for SaaS and NOT for on-premises. For on-prem environments, the web service access key will still be an option.
There are two ways to access Web Services/APIs in Business Central.
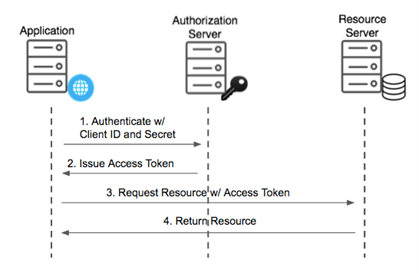
1. OAuth2 protocol with Service-to-Service (S2S) Authentication – This method uses application/service account to authenticate the web service/API request. Service-to-Service (S2S) authentication is suited for scenarios where integrations are required to run without any user interaction. Operation permissions will be determined by service-to-service setup.
To enable OAuth2 protocol with service-to-service authentication, you'll have to do the Following steps:
- Register an application in your Azure Active Directory tenant for authenticating API calls against Business Central.
- Grant access for that Azure AD application in Business Central.
Please find step-by-step official documentation here - https://docs.microsoft.com/en-us/dynamics365/business-central/dev-itpro/administration/automation-apis-using-s2s-authentication
Request Flow:
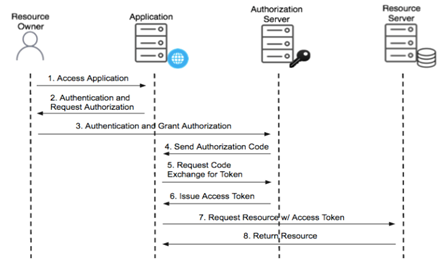
2. OAuth2 protocol WITHOUT Service-to-Service (S2S) Authentication – It uses AD account instead of application/service account to authenticate the web service/API request. Therefore, AD account will be used to perform operations (create, read, modify, and delete) in Business Central and user permissions apply.
- Register an application in your Azure Active Directory tenant for authenticating API calls against Business Central.
Request Flow:
Testing with Postman
Please see the parameters listed below which are required for OAuth2.
| Parameter | Value |
|---|---|
| Client ID | The Application (client) ID that was assigned during the app registration in Azure AD. If you didn’t copy it, then you can always find it in the app overview in the Azure Portal. |
| Secret | The secret that was created during the app registration in Azure AD. If you didn’t copy it, then you need to create a new application as there is no way to access the previously created secret. |
| Scope | https://api.businesscentral.dynamics.com/.default
This points to the permission that you selected during registration: API.ReadWrite.All or Automation.ReadWrite.All |
| Tenant ID | The tenant id is the GUID or domain name of the Azure AD of the Business Central environment that the application wants to call. It's the Azure AD in which the service principal was created when the application was granted consent.
It’s possible to use a GUID or to use the primary domain name of the Azure AD. |
| Environment | The name of the Business Central environment that the application wants to access, e.g., Production, Sandbox, etc. This is not a parameter for getting the OAuth access token, but it must be part of the API URL. |
OAuth2 protocol WITH Service-to-Service (S2S) Authentication
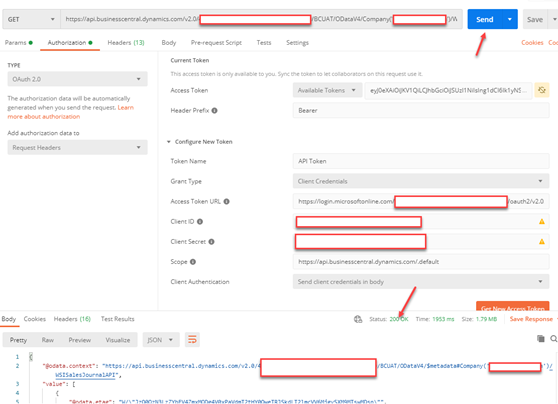
Enter the required parameters in postman as follows:
- Web Service/API URL
- Type – Auth 2.0
- Add authorization data to – Request Headers
- Header Prefix – Bearer
- Grant Type – Client Credentials
- Access Token URL - https://login.microsoftonline.com/{TenantID}/oauth2/v2.0/token
- Client ID
- Client Secret
- Scope - https://api.businesscentral.dynamics.com/.default
- Client Authentication – Send client credentials in body
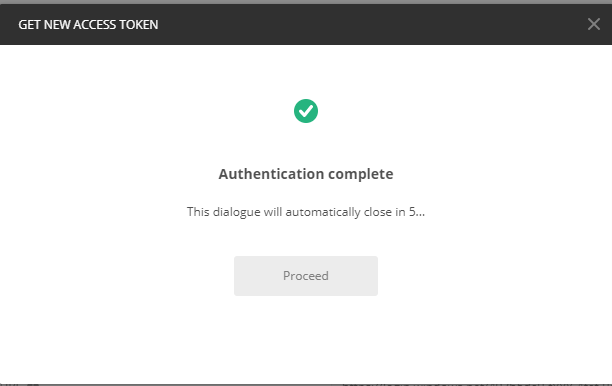
Step 1 – Click Get New Access Token button. It will use application account to authenticate and authorize the request. It will also send the access token back to postman.
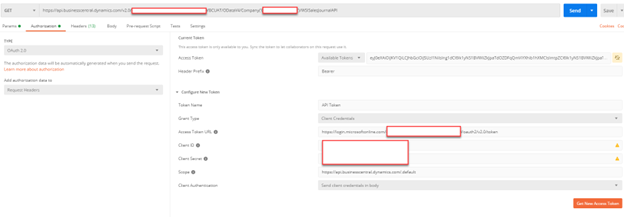

Step 2 – Send web service request (GET, POST) with new access token and check the response from web service call.
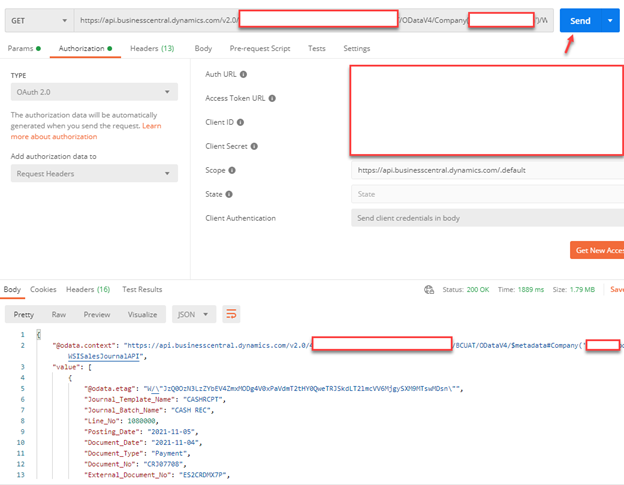
OAuth2 protocol WITHOUT Service-to-Service (S2S) Authentication
Enter the required parameters in postman as follows:
- Web Service/API URL
- Type – Auth 2.0
- Add authorization data to – Request Headers
- Header Prefix – Bearer
- Grant Type – Authorization Code
- Auth URL - https://login.windows.net/{TenantID}oauth2/authorize?resource=https://api.businesscentral.dynamics.com
- Access Token URL - https://login.windows.net/{TenantID}/oauth2/token?resource=https://api.businesscentral.dynamics.com
- Client ID
- Client Secret
- Scope - https://api.businesscentral.dynamics.com/.default
- Client Authentication – Send client credentials in body
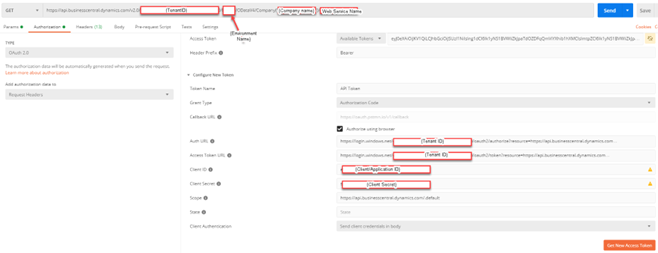
Step 1 – Click Get New Access Token button. It will open a new window to login with AD user account.
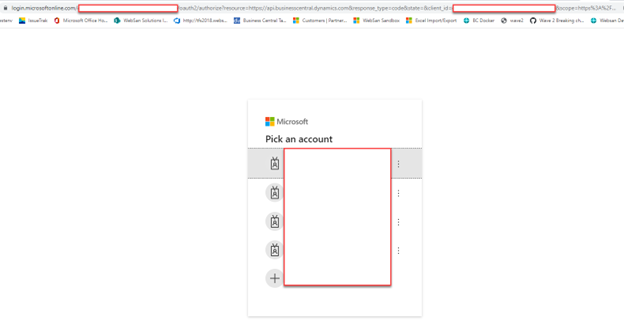
Step 2 – Login with AD user account which will authenticate the user and authorize the request. It will also send the access token back to postman.

Step 3 – Send web service request (GET, POST) with new access token and check the response from web service call.