Quick Create Forms, Data Entry Simplified!
One of the most common tasks for users in Dynamics 365 is entering data. Often users are required to enter data while on the call with a potential client or customer. Opening a new form and having to switch back and forth between screens can eat up valuable time for you and your client. It can also cause the user to lose focus and forget important information. Quick create forms give users a way to capture key information quicker and with less distractions.
To deploy quick create forms for your D365 environment, simply follow the steps below and you will be on your way to creating a more efficient data entry screen in no time.
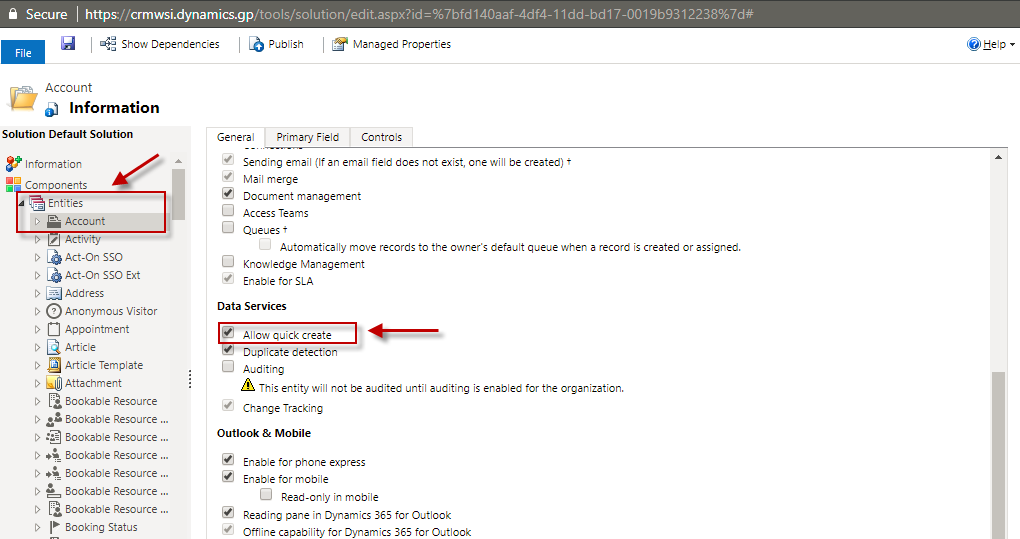
Firstly, to use quick create forms you must enable it on the entity level. To do so, go to Settings > Customizations > Customize the System.

In the customization window navigate to the entity you wish to create the quick create form for and confirm that the ‘Allow quick create’ box is checked, otherwise select it to enable this feature.

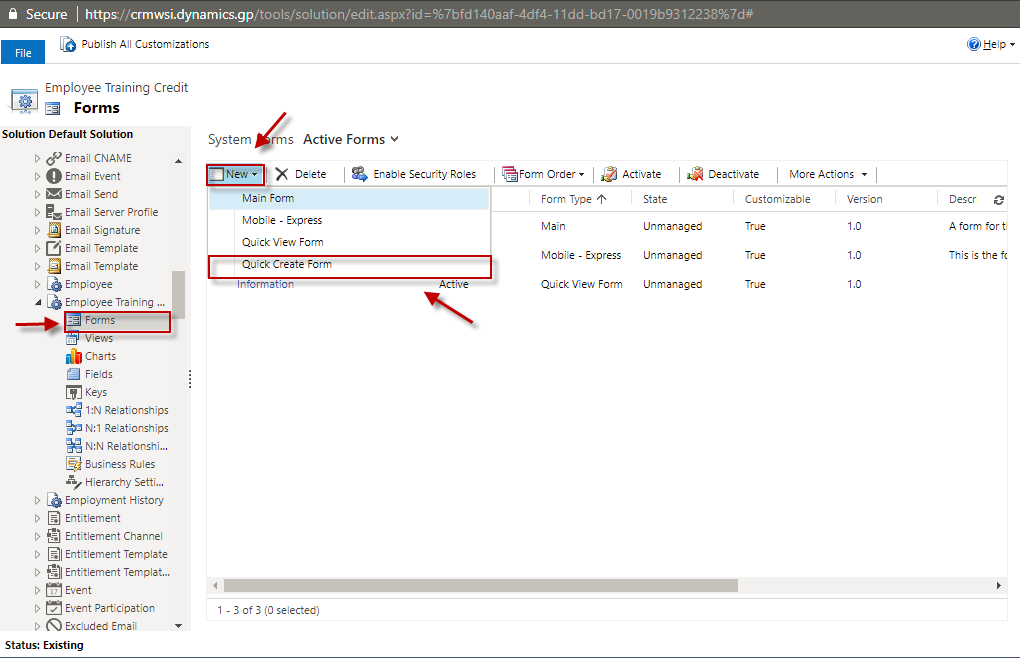
Now that this has been enabled, go to the entity’s form section > click new > pick quick create form. This will open the quick create form editor.

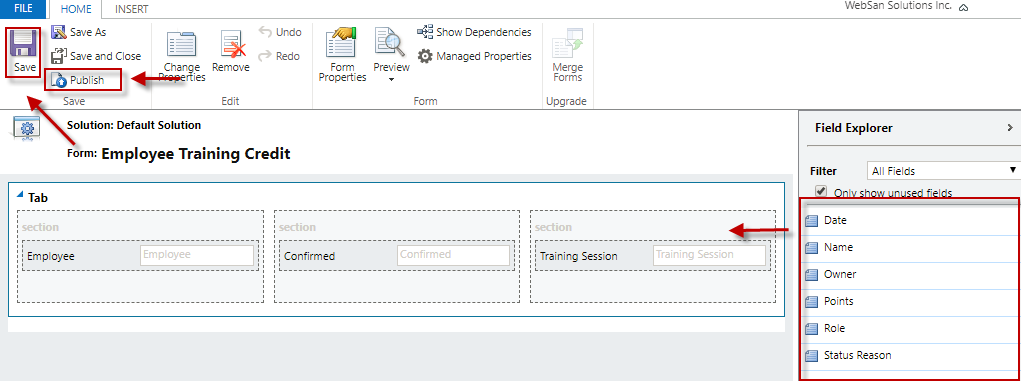
From here simply drag the fields you wish to use from the field explorer list on the right onto the central panel. Keep in mind the quick create form is intended to be an abbreviated version of the main form, so only add the key fields you need to capture.
Once this is done hit Save, then Publish.

To test out your new form, simply go back to the main page and refresh your browser. Look for the new icon in the navigation bar and find your form in the list.

Below is a sample of how a quick create form looks like when implemented.

Now that you know how to setup a quick create form, why not try it out for your organization. Your end users are sure to be pleased once you show them this new feature. For questions or assistance with implementing quick create forms for your D365 environment, email